Featured Game-Ready 3D Character: A Detailed Look at the Art and Process
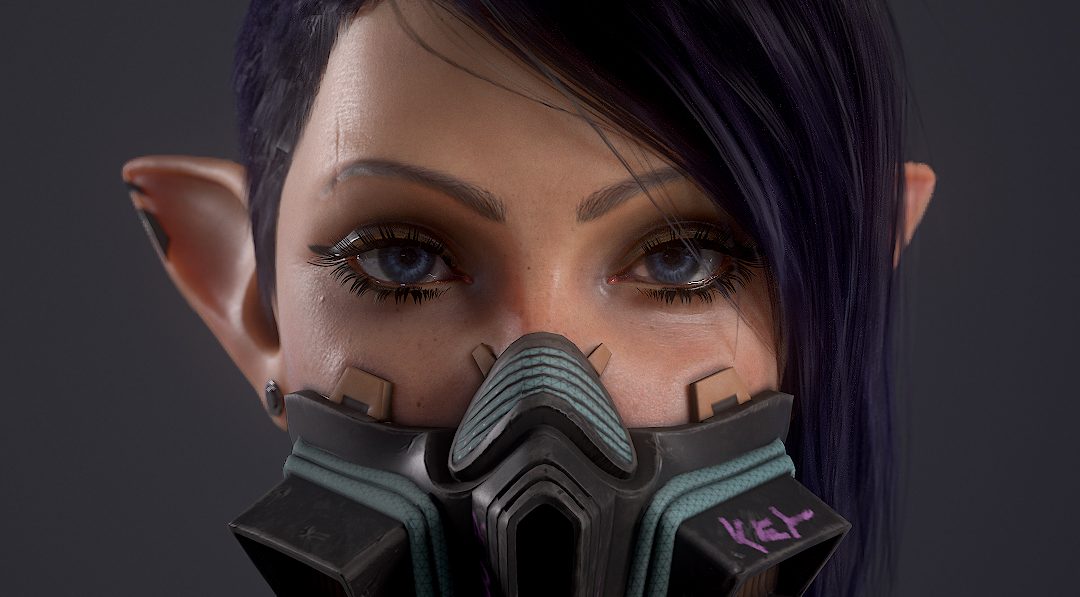
Creating a game-ready 3D character is always an exciting challenge, and this project was no exception. Our client came to us with a clear vision for a futuristic elf character with a striking appearance, and we worked closely with them to refine and bring their concept to life. The result? A highly detailed, visually striking character optimized for real-time rendering. Let’s dive into the creative and technical process behind this project.
Technical Details and Workflow
To achieve the desired result, we utilized a combination of industry-standard tools and techniques. Here’s a closer look at the technical breakdown:
- 1. Sculpting
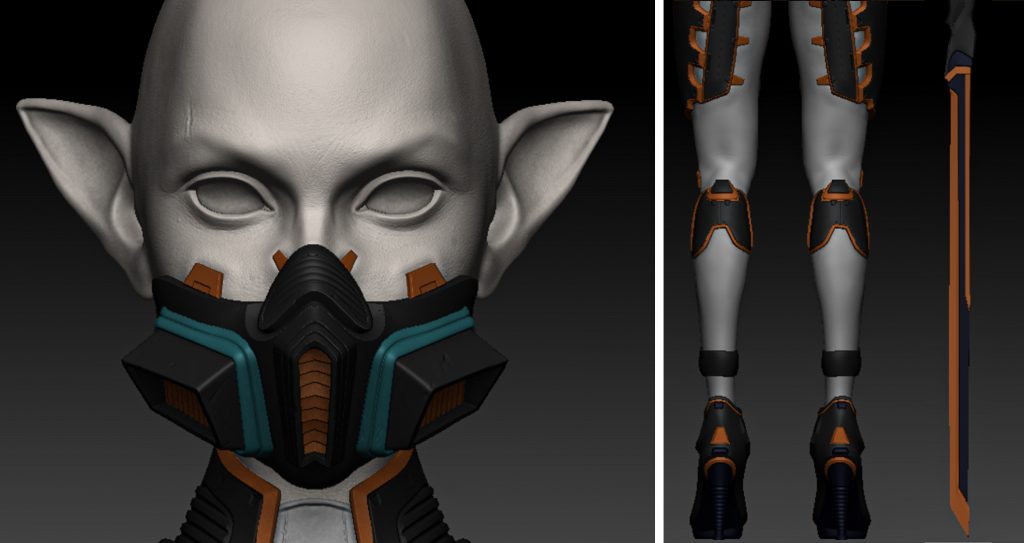
The character was initially sculpted in ZBrush, where we focused on defining the base anatomy, facial features, and armor details. For the armor, we used ZBrush’s mask-inflate technique, allowing us to quickly block out the main shapes before refining them into high-detail elements. This approach ensured that the armor looked both functional and futuristic.
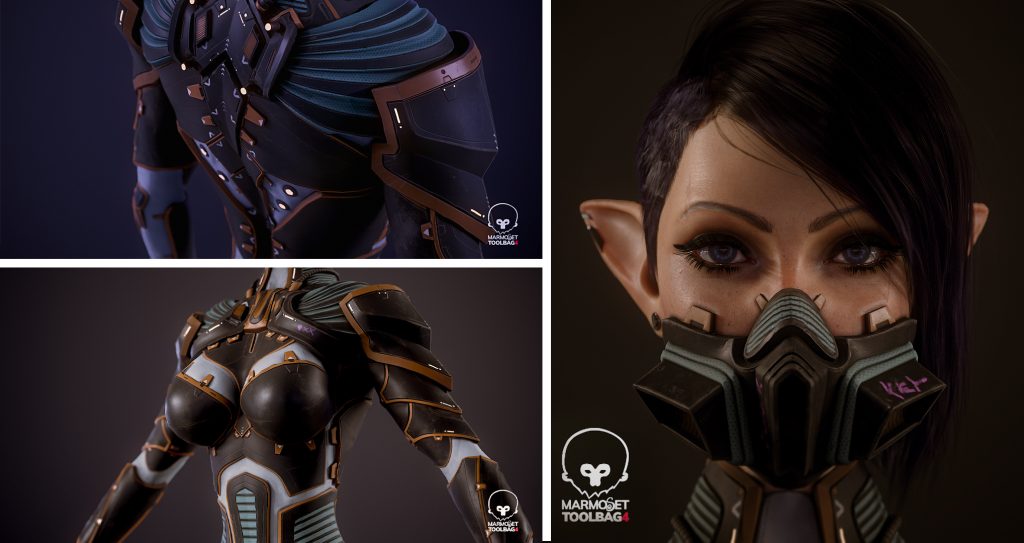
To bring lifelike realism to the character, we paid special attention to the skin details. Using custom alphas and brushes, we sculpted fine pores, wrinkles, and subtle imperfections across the face and body. These details were crucial for adding depth and making the character’s skin feel natural, especially when paired with Subsurface Scattering (SSS) during rendering to simulate light passing through the skin.
- 2. Retopology and UV Unwrapping
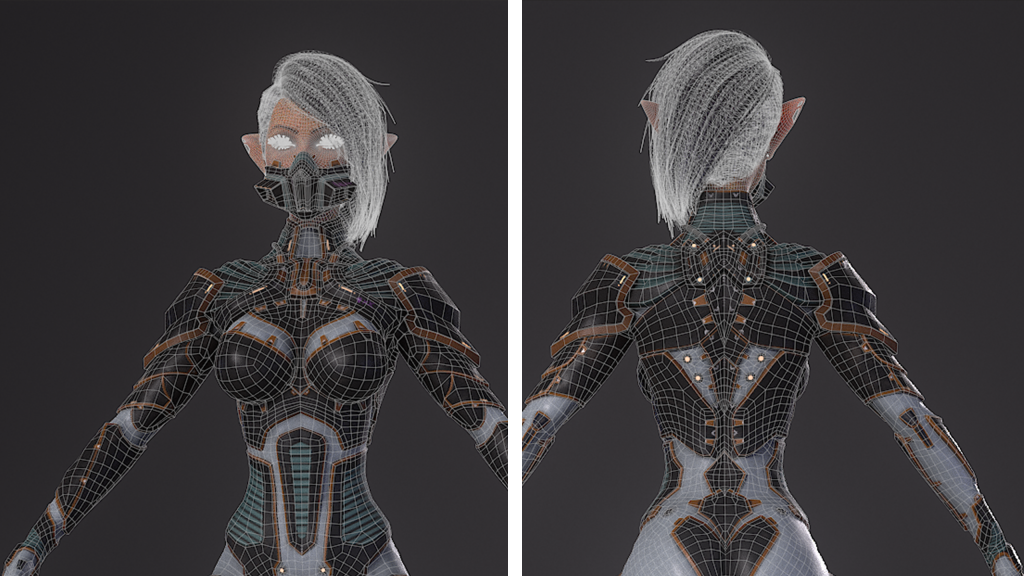
Once the high-poly sculpt was finalized, the model was imported into Blender for retopology. This step was essential for creating an optimized low-poly model suitable for game engines. The total polygon count came out to 78,000 triangles, distributed as follows:
- Hair: 35,000
- Full body: 37,000
- Sword: 6,000
The model was then UV unwrapped, ensuring efficient use of texture space and seamless integration with the next steps.
- 3. Baking and Texturing
The high-poly details were baked onto the low-poly mesh using Substance Painter, leveraging a PBR (Physically Based Rendering) workflow. The armor’s materials were designed to evoke a high-tech feel, combining metallic surfaces with emissive elements. Subtle wear and tear were added to enhance realism and give the character a sense of history.

Game Ready Hair and Hair Cards
We used hair cards to achieve the perfect balance between visual fidelity and performance. Hair cards are lightweight and render efficiently, making them ideal for game engines. By layering and shaping the cards, we achieved the character’s sleek and dynamic hairstyle.
Texturing
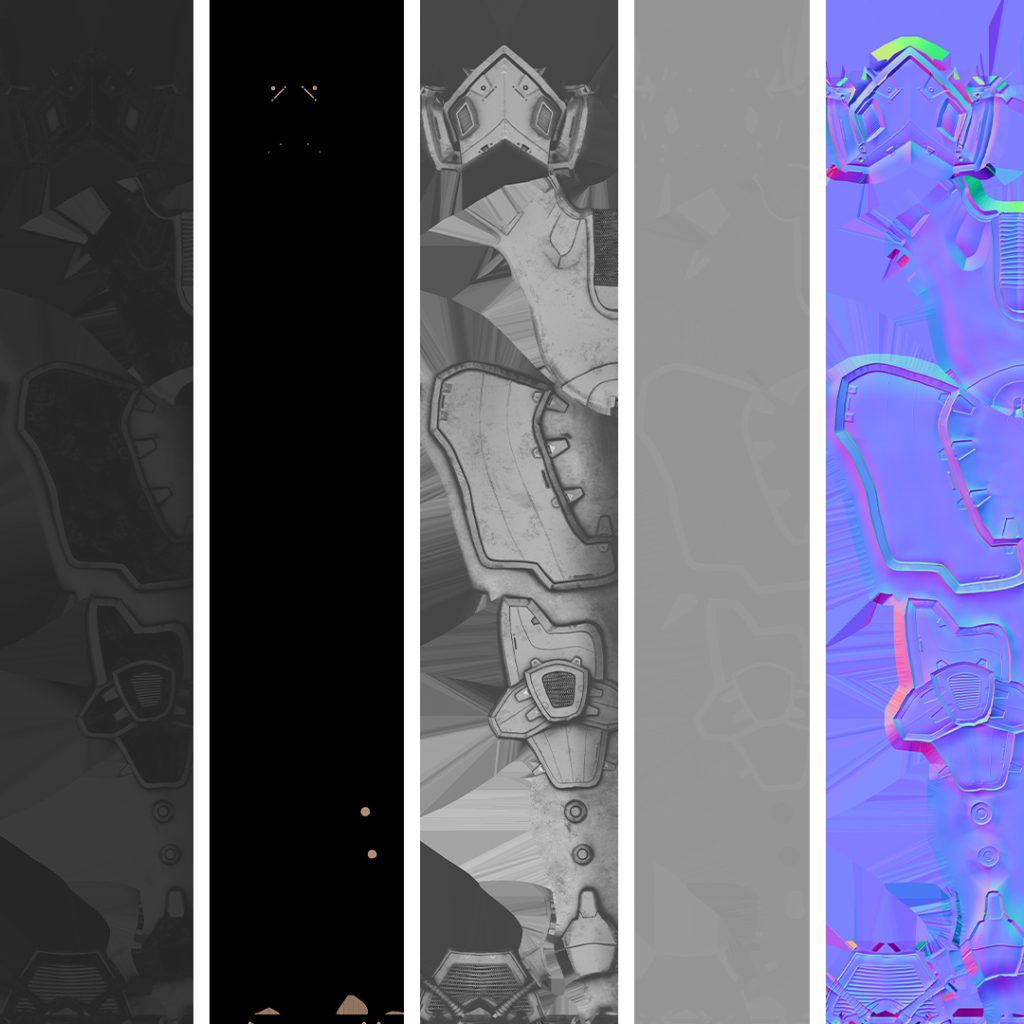
For this character, we utilized three distinct UV map sets to ensure optimal texture detail and organization. Each map set included normal, height, gloss, emissive, diffuse, and specular maps, tailored to specific parts of the character.
- Body and Armor: A dedicated map set to capture the intricate details of the armor and the character’s body, ensuring sharp textures and seamless material transitions.
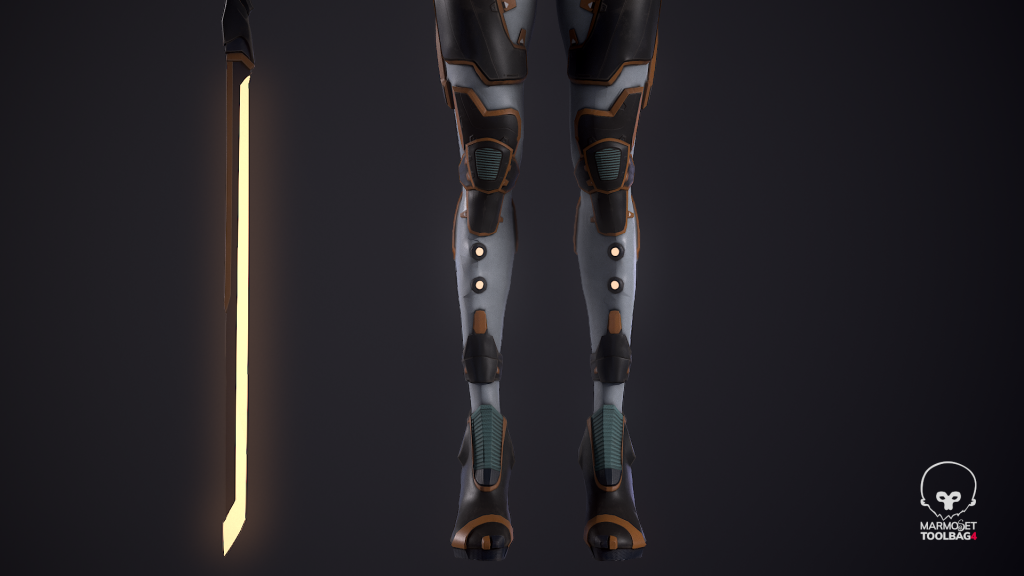
- Weapon and Accessories: A separate map set for the sword and smaller elements, allowing for precise texturing and emissive effects on the glowing weapon.
- Head with Subsurface Scattering (SSS): The head’s map set incorporates SSS to simulate realistic skin translucency, adding depth and lifelike qualities to the character’s face.
- 4. Rendering and Presentation
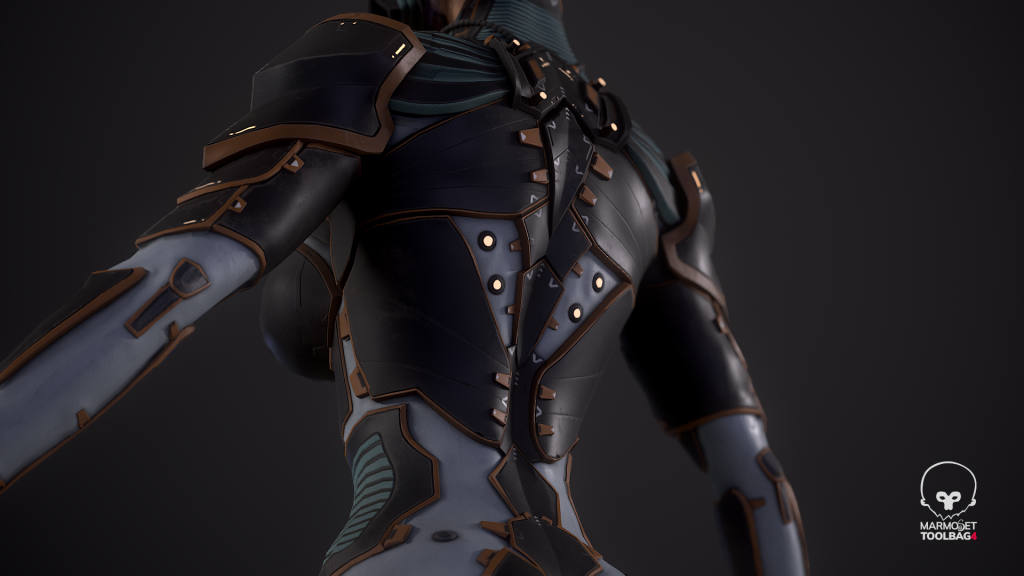
To showcase the final model, we used Marmoset Toolbag, which allowed us to render the character in high fidelity. This tool was instrumental in highlighting the intricate details of the armor, the soft shading on the face, and the glowing edges of the sword.
Colorization and Value Balance
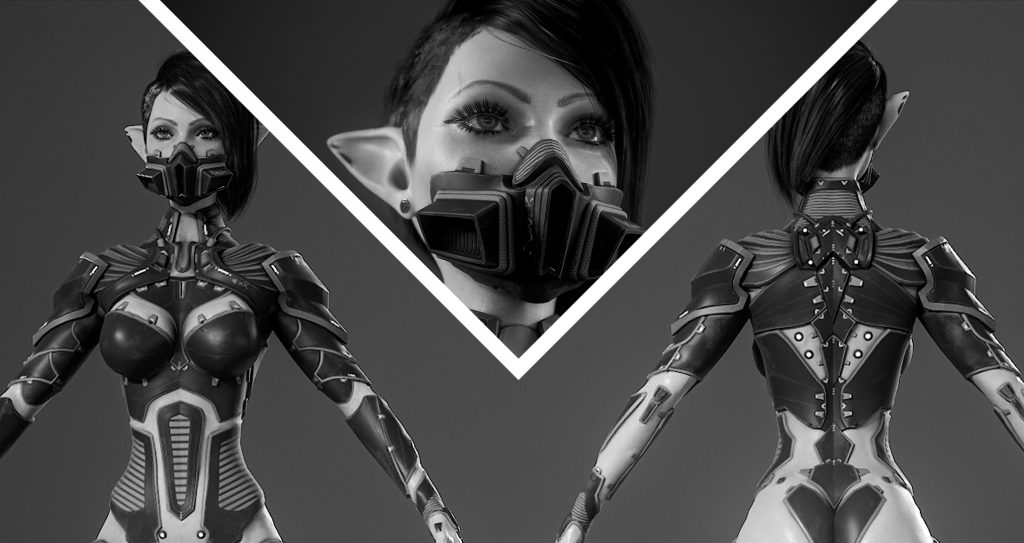
A key aspect of this character’s design was ensuring a strong value balance—the contrast between light and dark elements. By converting renders to grayscale during the design process, we could focus on contrast alone, making sure the character remained visually striking and readable.
How Value Checking Helped
- Armor Panels: The mix of lighter metallic surfaces and darker matte areas enhances the armor’s depth and guides the viewer’s eye.
- Glowing Accents: Bright emissive details, like the sword and armor highlights, pop against the darker elements, adding a futuristic touch.
- Facial Features: Subtle highlights around the eyes and mask ensure the face remains a focal point, even in grayscale.
This deliberate use of contrast ensures the design is visually appealing and readable in both full color and grayscale, making the character stand out in any context.
Programs Used
This project combined the strengths of several tools to produce a polished final result:
- ZBrush: For high-poly sculpting and initial armor designs.
- Blender: For retopology, UV unwrapping, and additional modeling tasks.
- Substance Painter: For baking and creating PBR textures.
- Photoshop: For texture detailing and adjustments.
- Marmoset Toolbag: For rendering and presentation.
Final Thoughts
This project was a rewarding journey from concept to completion. The client’s input was invaluable in shaping the final design, and the collaborative process allowed us to push the boundaries of creativity and technical execution. We’re thrilled with the result and look forward to seeing the character in action in its intended game setting.
If you’d like to know more about this project or have a similar vision for your own game or digital experience, feel free to reach out. We’d love to help bring your ideas to life!
Thank you to our client for trusting us with this exciting project!